Hummus bel Tahina Story and Recipe
Hummus bel Tahina
Like many Lebanese families, every Sunday my extended family gathered at my grandparents house for lunch (feast). My Grandpa made hummus while my grandma did the cooking; he always handled the hummus.
In his late 80s and in great health, Grandpa was the quintessential Mediterranean man. He had pure white hair that only grew on the side of his otherwise bald head. He rose at 4 or 5 o’clock (or so I’m told, as I can only confirm he was up by 6 am or later— which was the time I occasionally came back home after being out with friends the night before.) He owned his own retail business, which he walked to in the mornings, then walked back home for lunch and a three-hour siesta, then went back to work for a bit in the late afternoon. He did that religiously six days a week. Except Sundays.
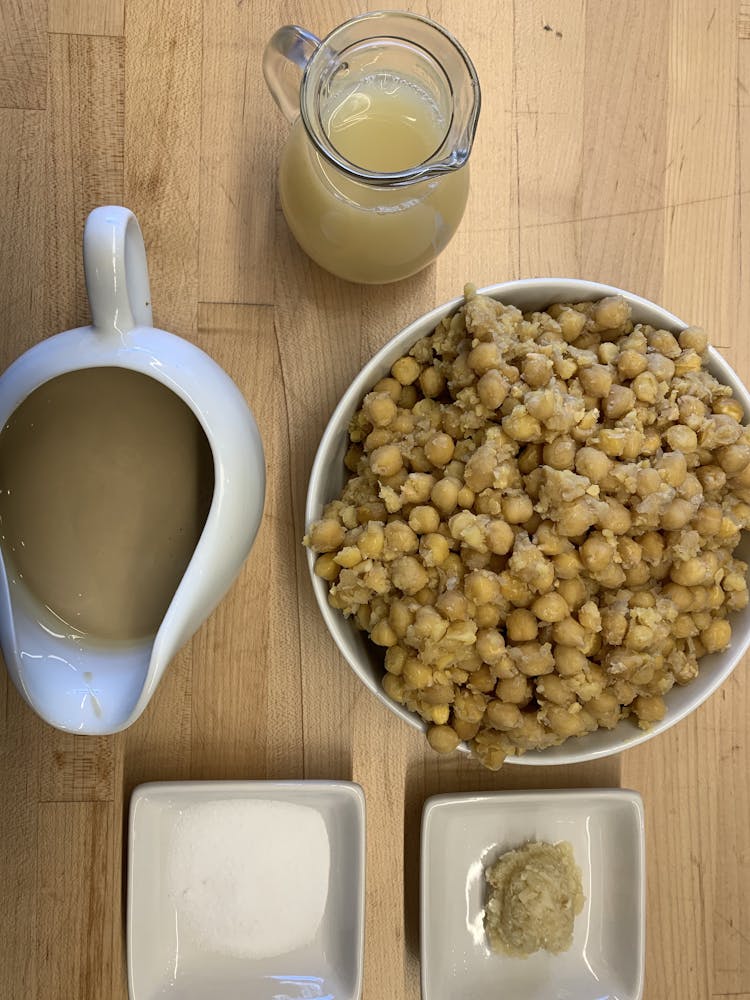
Back then we didn’t use food processors and he would grind the beans and garlic by hand with a wooden mortar and pestle. The hummus he made had only five ingredients in it: garbanzo beans, garlic, tahini (sesame paste) freshly squeezed lemon juice and salt, with an additional two: olive oil and cumin, to garnish.
Sensing my affinity to food at an early age, I was always designated the hummus taster, sampling the hummus to perfect the flavor, adding a bit of lemon juice or tahini to make it just right. I don’t think they knew what a recipe was back then.
When I opened Falasophy I used the same ingredients and developed an exact recipe using my hummus taster taste buds. I’m sharing a scaled down version of it here. As with many delicious things, the recipe itself is less significant than the process and ingredients. Enough about me and my family. Let’s start, shall we?
In my opinion, there are a few non-negotiables around hummus or home-made hummus, to be exact. It should always be made from fresh beans (not canned), with fresh lemon juice (never from concentrate), and please, please fresh garlic (not powder or garlic salt). Lastly, no additives— the most common one being lemon salt, which seems to strengthen the lemony-ness of the hummus and make it extra white in appearance.
To be completely honest with you, if you must compromise and use canned beans or garlic salt, I honestly think you can come up with a good hummus. I have had plenty of good batches that don’t follow the rules above. Having said that, you do have to ask yourself what the purpose of making hummus from scratch is. You might as well buy one from a supermarket (most use canned beans and violate all of the above). Trader Joes is my favorite out there of the bunch.
If you decide to commit and do it right, this recipe is for you. It’s actually not that hard. It’s just a three day process.
Day one: Soak the Beans
Day two: Cook the Beans
Day three: Make the hummus.
Note: You could make the hummus the same day you cook the beans, but it is important that you cool the beans first. If you don’t, the hot beans will cool the other ingredients and they will compromise the recipe somewhat.
Process:
Soak dry garbanzo beans in cold water at room temp for 12-24 hours, 18 hours being ideal. Do not cover the soaking beans, as they need to breathe.
Drain beans and wash well.
Place beans in a tall pot and cover with water at least an inch above the beans. Leave some room on top, and don’t overfill the pot.
Boil the beans well. You may need to add a teaspoon of baking soda here to get it to cook properly. It helps the cooking process. Stir often with a large slotted spoon. As you stir, some skin from the beans will detach and float to the top. Remove them from the pot. The liquid will also foam and create a yellowish-white foam. Skim that as well. You may need to add additional water.
The beans are done when they are very soft and tender, but not mushy. You should be able to mash a bean with a very light pinch at this point.
Drain the water well using a colander and let the beans cool. When they reach room temperature, transfer to a smaller container, cover and place in the fridge to chill.
Once the beans are fully chilled you can start making the hummus.
Next get a mortar and pestle and bang away at two to three (three or four if you are Lebanese) garlic cloves. Add just a pinch of salt to the garlic and start slowly increasing in intensity as the garlic mashes. Mash them well.
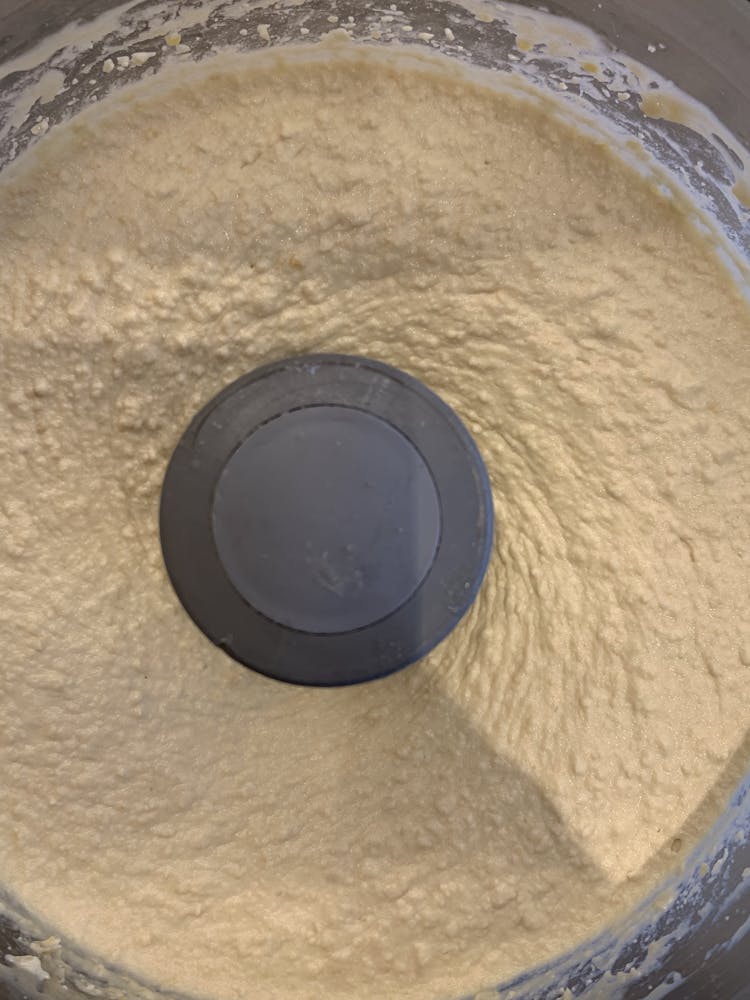
The biggest departure from my grandfather's process is that we will use a food processor. I am sorry to disappoint you, but we won’t be grinding the beans by hand. You could, however, use a mill. I have never tried it myself, but I’ve heard many who have and it seems like a good process.
Place about half your beans in a food processor. Add the tahini, lemon juice and blend away. When mixed, add all remaining ingredients and throw in two ice cubes. The ice cools the mixture down and improves the consistency in the process.
Blend till fully mixed and hummus is creamy. Don’t over blend. If you have Lebanese blood in you, you’ll probably add more garlic and lemon, but I’ll leave that to your discretion.
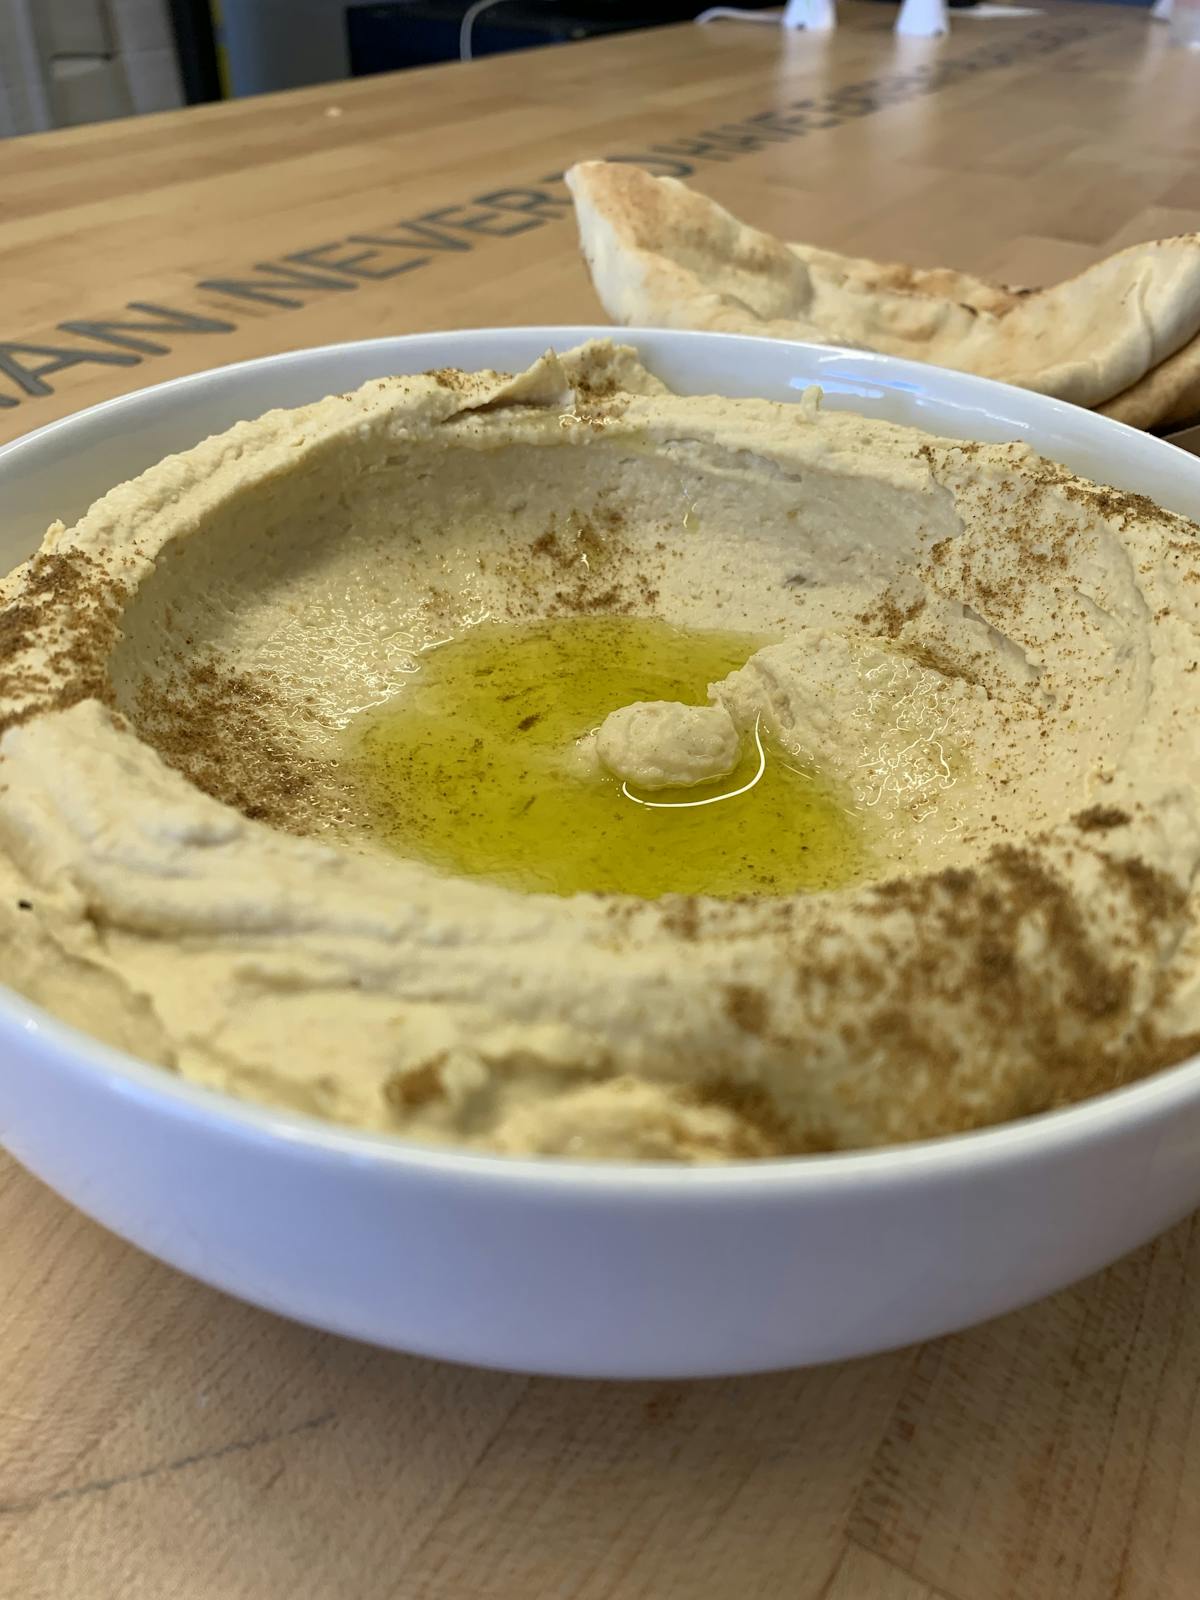
Remove mixture from the food processor and place in a bowl. Use a spoon to shape the hummus like those fancy plates you see in restaurants. Sprinkle some cumin and drizzle some extra virgin olive oil on top. Enjoy with pita.
Hummus bel Tahina Recipe
2 Cups of Dry Bean - soaked overnight, rinsed and drained then cooked with 1 teaspoon+ of baking powder - this should make about 4 cups of cooked chickpeas
For each 2 cups of cooked chickpeas
⅓ to ½ cup fresh lemon juice
½ to 1 teaspoons of crushed garlic
¾ teaspoon salt
⅓ to ½ cup tahini sauce
Place cooked chickpeas, tahini and lemon juice in a food processor and process until a smooth paste, stir as needed with a spatula to mix it up and add an ice-cube or two as you go. Add remaining ingredients and process until fully blended and smooth.